This article is part 3 of my blog series on how to create and build your native GNOME app. If you are missing the previous parts, please visit the part 2 or part 1
In this third part, I will write about the development phase where you will interact with programming language.
First time launching the GNOME Builder
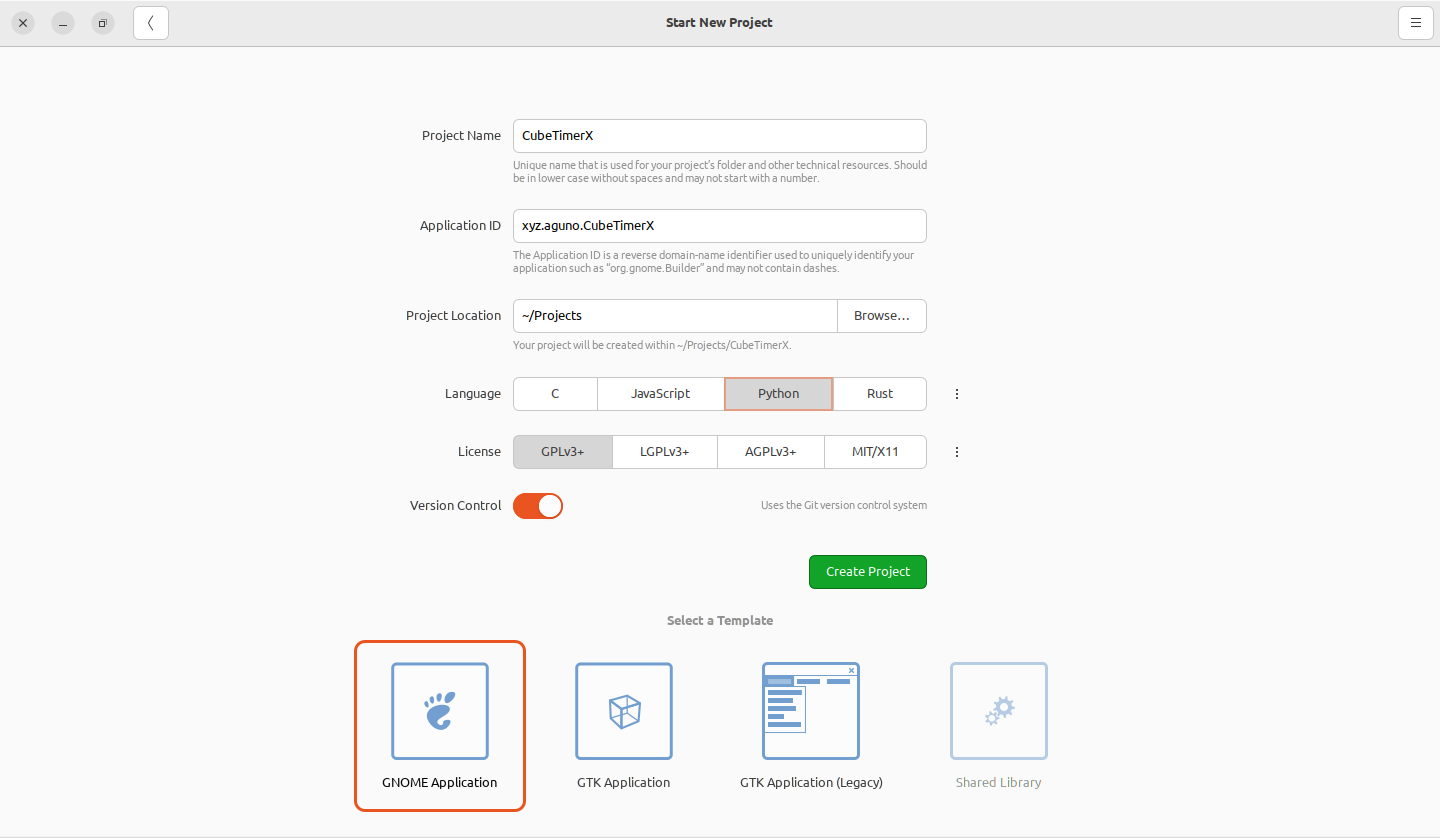
Once GNOME Builder opened, you will be asked whether you want to open the existing project, open the example project or c
Then pick your prefered programming language (in this case, Python) and license, then select GNOME Application as template. Once you click “Create Project”, you will be redirected to your working environment.
After you get redirected to the main UI of the GNOME Builder for the first time, you may be asked to install or update few SDKs. Please follow the instruction to download the SDKs.
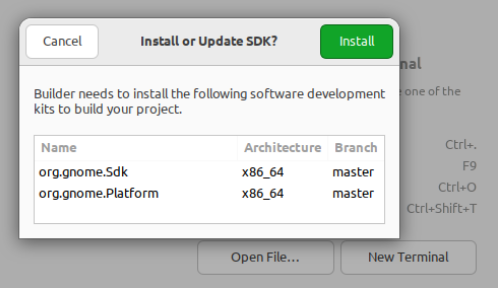
It will download a few hundreds Megabytes of depedencies.
The anatomy of GNOME Builder
Basically, the GNOME Builder UI is divided into 5 parts:
1. The top bar buttons
This your main command control. You can switch the surface mode, add new file, build and run (or configure the build), search and at the end of the top bar, you have GNOME Builder main menu.

2. The side pane
The side pane consist of the Project Tree, build status and the TODO list. In this area, most of the time you will focus on the Project Tree, especially the Files.
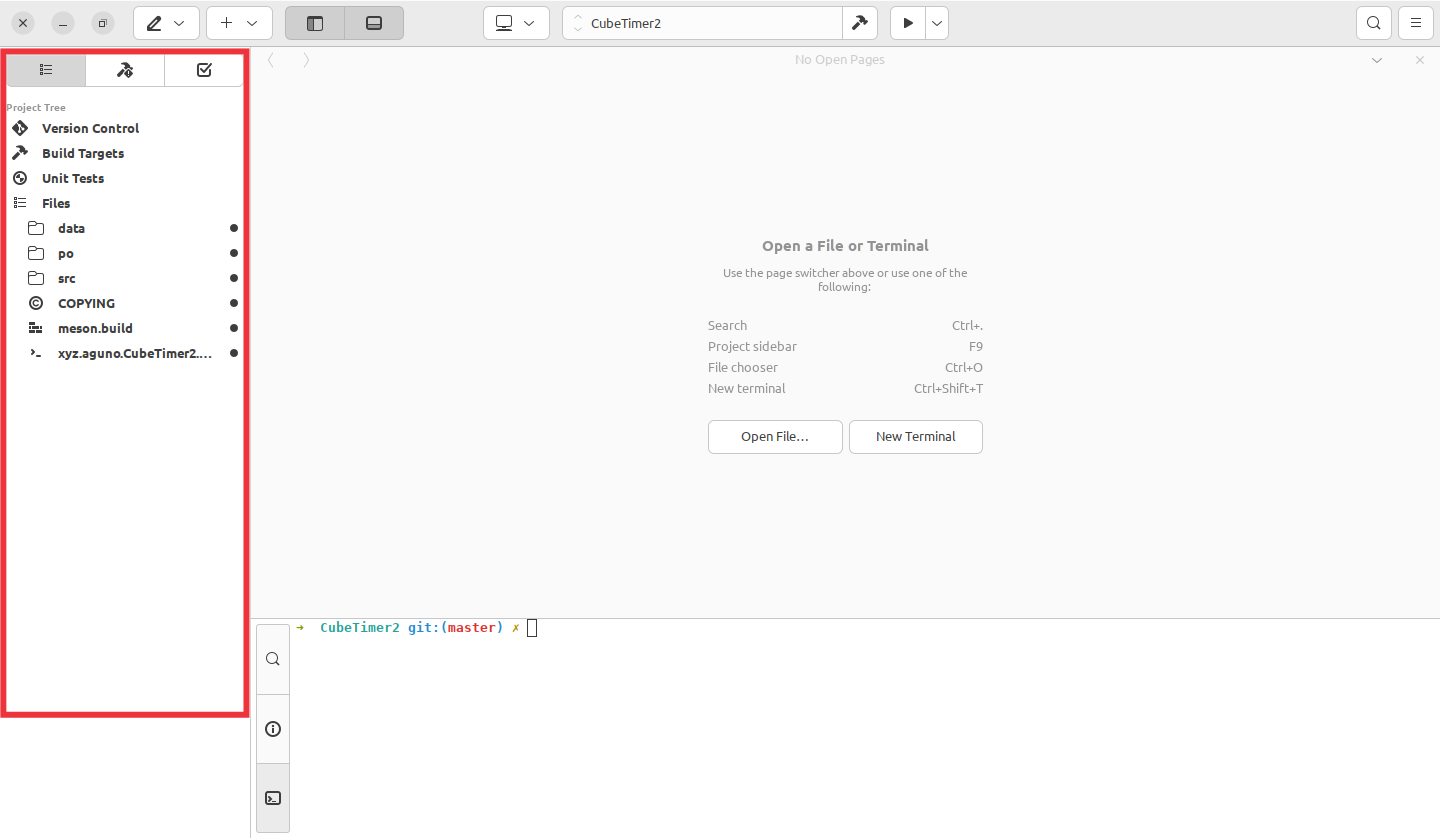
3. The text editor
This is the bigest part that occupy the UI. If you try to click on a file in the Project Tree (e.g. xyz.aguno.CubeTime), the file will be opened in this area. This is where you write the code. It does not have fancy feature like other advanced IDE but at least (if you are a Vim user) it supports Vim key binding.

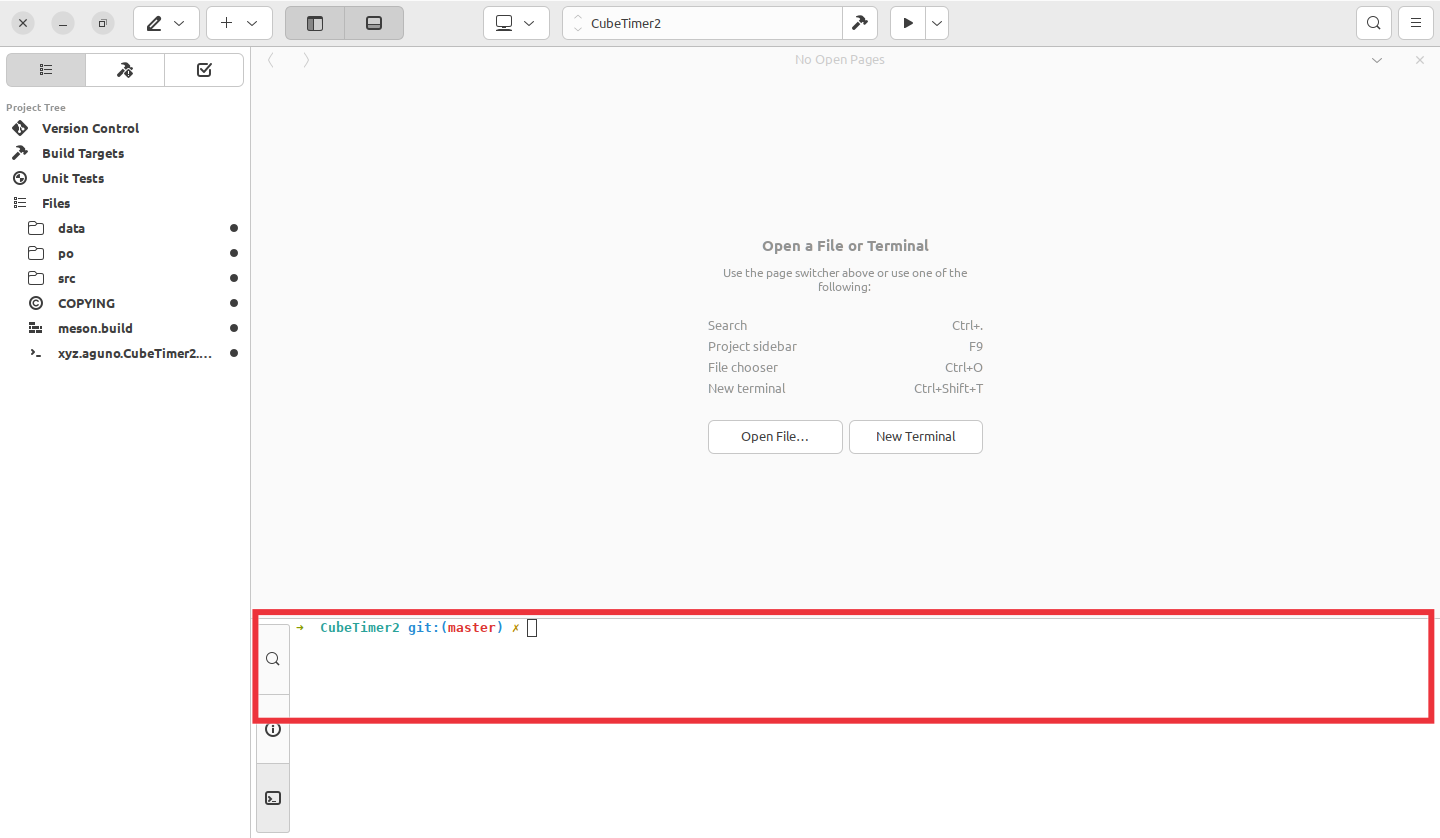
4. The bottom pane
The bottom pane are accessible by a button in the top bar. By default it will open a terminal emulator. It also has logger (for debugging) and search feature.
The most important files in the Project Tree > Files
In this tutorial, mainly you will be editing these three files:
1. src/main.py
This is the first script to invoke your program. If you want to have command argument or have dependency injection from the root, this is the place.
2. src/window.py
This is where you will write the logic of your app. It tied heavily with src/window.ui. You will call and modify components, also receive events from the components (click, text input, etc).
If you think it’s better to separate the logic in different file, then please go ahead. Apply your best coding practices! However, in this blog post series, I’ll focus on writing the logic in the window.py to simplicy the process.
3. src/window.ui
This is actually an XML file where you could design the layout and UI components of your app. Either you edit the file directy or open it with external app like Glade or Cambalache.
Working with Cambalache and creating the basic layout
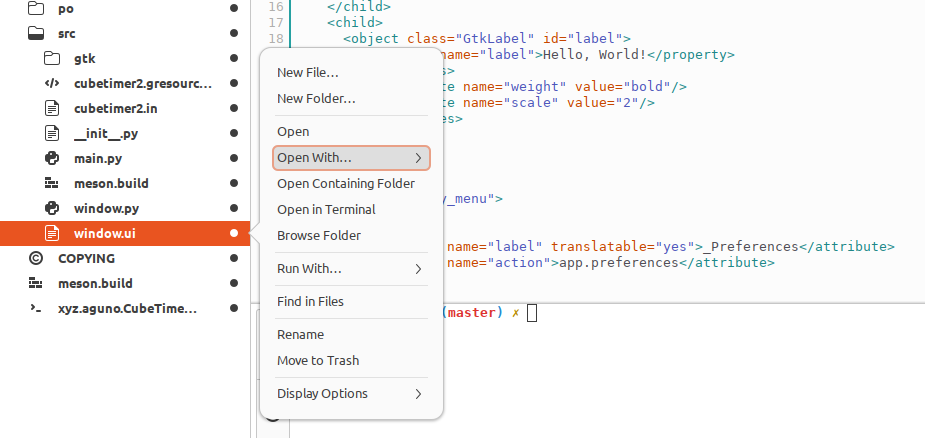
Let’s open the src/window.ui file with Cambalache and edit your first layout! You can simply right click the file then select Open With... then External Programs... then select Cambalache.
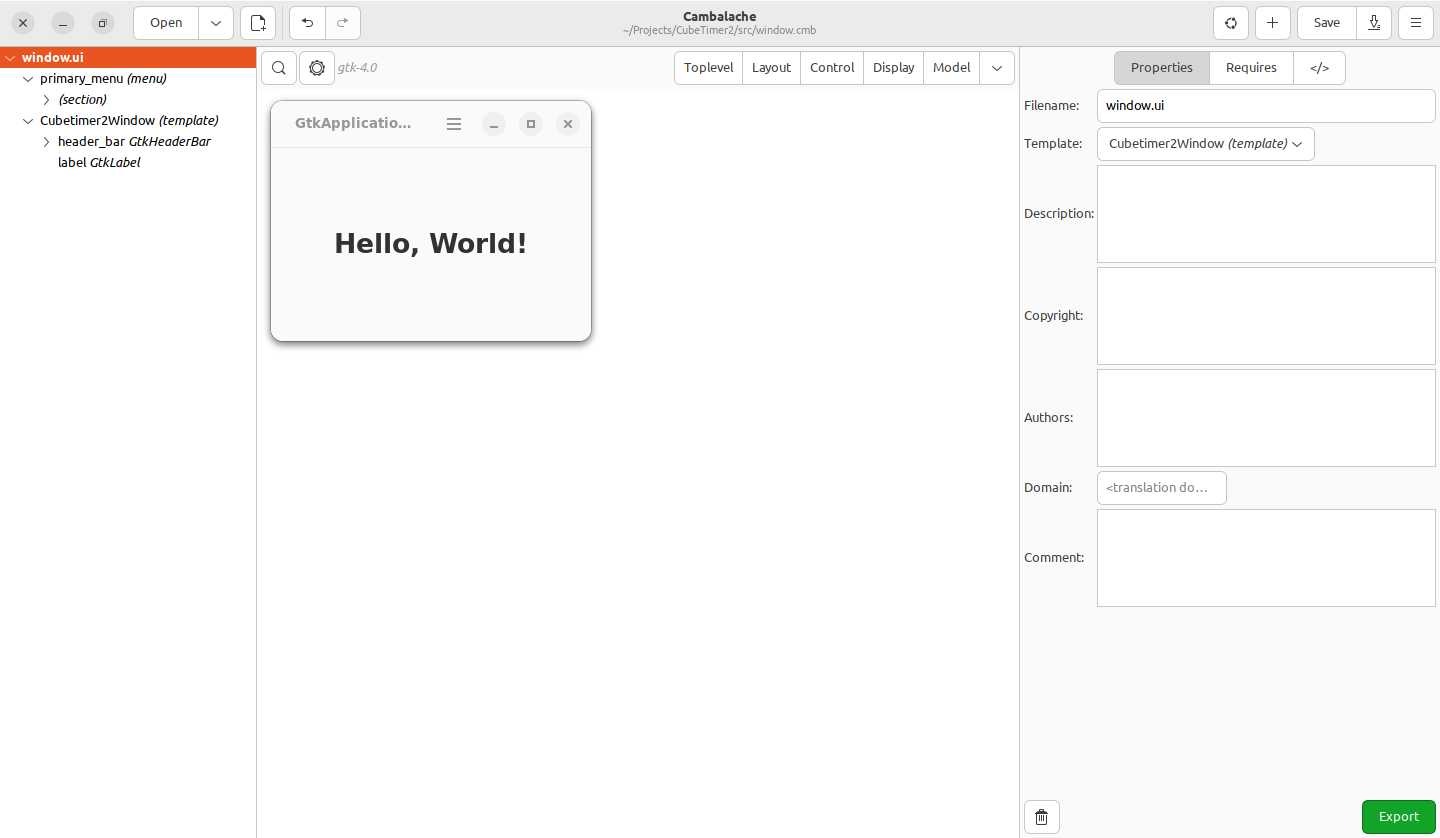
The Cambalache will be opened with your UI loaded and rendered. You will see a small window with Hello, World! label.
Let’s go back a bit to review our design. We will try to construct a grid with 3 rows then add label to each row. The first label is for the scramble notation, the second one is for the timer, and the last one is for the recorded solving time.

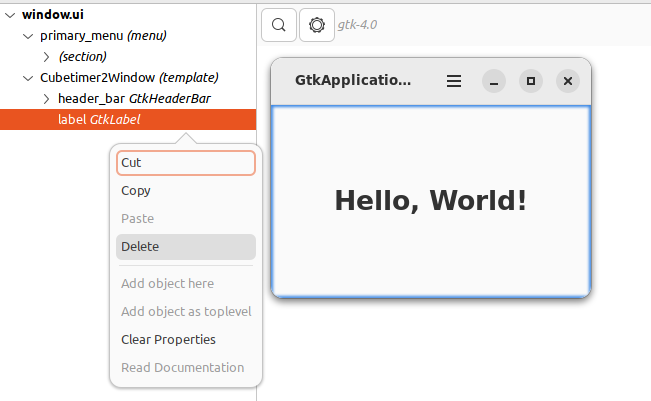
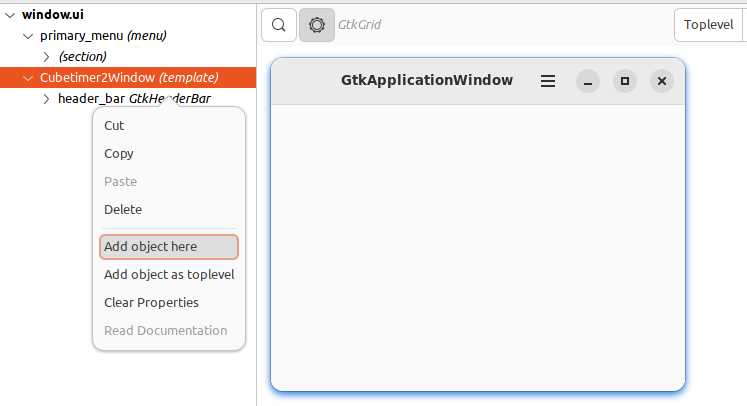
The first thing you need to do with Cambalache is to remove the existing component here, which is the label component.
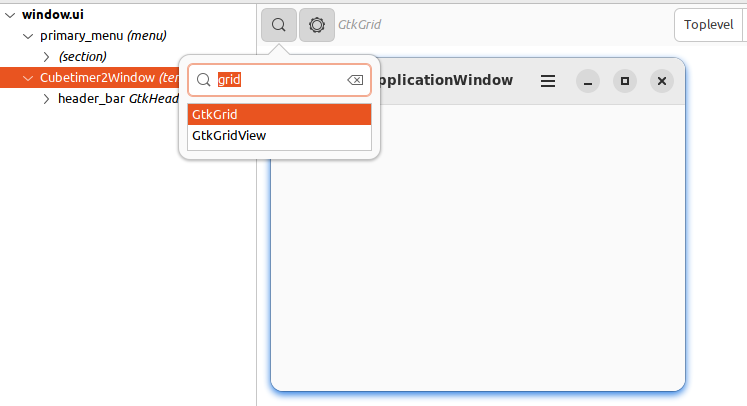
Then add a grid layout by typing the keyword grid and select GtkGrid
To apply the layout component, you need to right click the parent component the click Add object here....
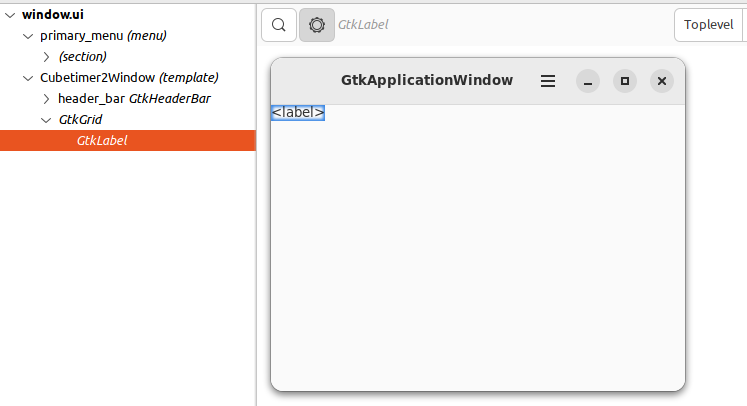
You need to the same thing for label component, but apply it under the GtkGrid component instead. So you will have this hierarchy of components.
At this point, Cambalache has played its part on helping us to put the basic layout, we will continue to modify the XML file manually to expand the grid into 3 rows with label in each row. If you need a reference of GTK components, you can always go back to Cambalache to explore.
I know this is not an intuitive way to construct an UI design. In comparation, Glade and QtCreator is a lot better. But please remember the fact that Cambalache is newly born software.
Expanding the basic layout manually
What we did in the Cambalache before is these lines of code:
...
      <object class="GtkGrid">
        <child>
          <object class="GtkLabel">
            <layout>
              <property name="column">0</property>
              <property name="row">0</property>
            </layout>
          </object>
        </child>
      </object
...
Since we need it to be expanded to 3 rows, we have to add more childrens to the grid. And for each child in the GtkLabel, let’s set the label value and the row number. The row number start from 0, so we can set 1 for the second row and 2 for the third row.
...
      <object class="GtkGrid">
        <child>
          <object class="GtkLabel">
            <property name="label">Scramble notation</property>
            <layout>
              <property name="column">0</property>
              <property name="row">0</property>
            </layout>
          </object>
        </child>
        <child>
          <object class="GtkLabel">
            <property name="label">Timer</property>
            <layout>
              <property name="column">0</property>
              <property name="row">1</property>
            </layout>
          </object>
        </child>
        <child>
          <object class="GtkLabel">
            <property name="label">Recorded solving time</property>
            <layout>
              <property name="column">0</property>
              <property name="row">2</property>
            </layout>
          </object>
        </child>
      </object
...
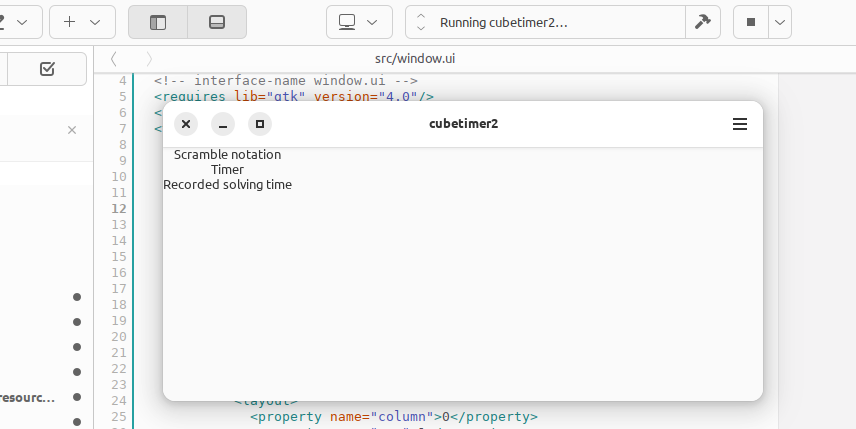
At this point, if you run the app through the Play button from the top bar of GNOME Builder window, you will get this.
Let’s expand it again to be more proportional and a sleek look! We add a lot of properties here. Short explanation of them:
id- to add the identifier so that we could connect this component to some function, e.g. for event handler like click or text input.margin-topandmargin-bottom- to add specific margin around the component.hexpandandhexpand-set- to expand the component horizontaly.vexpandandvexpand-set- to expand the component verticaly.<style>and<class>tag - to define the CSS style. Yes, we will be using CSS here! Feel like a web development, right?
...
      <object class="GtkGrid">
        <child>
          <object class="GtkLabel" id="ScrambleNotation">
            <property name="hexpand">True</property>
            <property name="hexpand-set">True</property>
            <property name="label">Scramble Notation</property>
            <property name="margin-top">30</property>
            <property name="margin-bottom">15</property>
            <property name="vexpand">False</property>
            <property name="vexpand-set">True</property>
            <style>
              <class name="scramble-label"/>
            </style>
            <layout>
              <property name="column">0</property>
              <property name="row">0</property>
            </layout>
          </object>
        </child>
        <child>
          <object class="GtkLabel" id="Timer">
            <property name="focusable">True</property>
            <property name="hexpand">True</property>
            <property name="hexpand-set">True</property>
            <property name="label">00:00.00</property>
            <property name="vexpand">True</property>
            <property name="vexpand-set">True</property>
            <style>
              <class name="timer"/>
            </style>
            <layout>
              <property name="column">0</property>
              <property name="row">1</property>
            </layout>
          </object>
        </child>
        <child>
          <object class="GtkLabel" id="PrevScrambleNotation">
            <property name="hexpand">True</property>
            <property name="hexpand-set">True</property>
            <property name="margin-top">15</property>
            <property name="vexpand">False</property>
            <property name="vexpand-set">True</property>
            <style>
              <class name="prev-scramble-label"/>
            </style>
            <layout>
              <property name="column">0</property>
              <property name="row">2</property>
            </layout>
          </object>
        </child>
        <child>
          <object class="GtkLabel" id="Prev2ScrambleNotation">
            <property name="hexpand">True</property>
            <property name="hexpand-set">True</property>
            <property name="margin-top">15</property>
            <property name="vexpand">False</property>
            <property name="vexpand-set">True</property>
            <style>
              <class name="prev-2-scramble-label"/>
            </style>
            <layout>
              <property name="column">0</property>
              <property name="row">3</property>
            </layout>
          </object>
        </child>
        <child>
          <object class="GtkLabel" id="Prev3ScrambleNotation">
            <property name="label">Usage: press and hold space bar, then release to start the timer.</property>
            <property name="hexpand">True</property>
            <property name="hexpand-set">True</property>
            <property name="margin-top">15</property>
            <property name="margin-bottom">30</property>
            <property name="vexpand">False</property>
            <property name="vexpand-set">True</property>
            <style>
              <class name="prev-3-scramble-label"/>
            </style>
            <layout>
              <property name="column">0</property>
              <property name="row">4</property>
            </layout>
          </object>
        </child>
      </object>
...
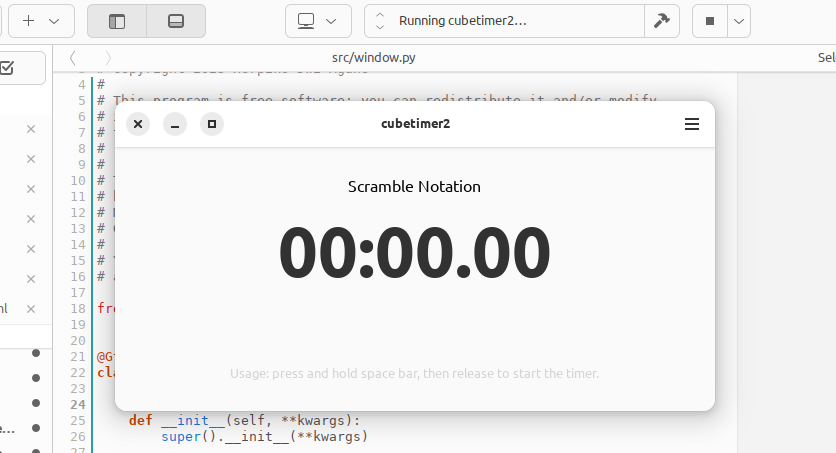
At this point, your app will looks like this. This is enough for now. We will continue to write the CSS file.
From GNOME Builder template, we got Menu button and this menu button is the main/first focus of the window. We will manipulate this button later (disabling focus), so we need to add identifier for it. Let name it Menu.
          <object class="GtkMenuButton" id="Menu">
            <property name="icon-name">open-menu-symbolic</property>
            <property name="menu-model">primary_menu</property>
          </object>
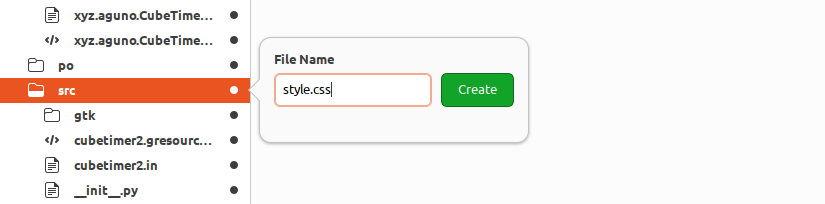
Strike the styles through CSS
Let’s add new file (style.css) under the src directory.
And then fill it with this CSS code:
.scramble-label {
  color: black;
  font-size: 16px;
}

.timer {
  font-size: 70px;
  font-weight: bold;
}

.timer-grey {
  color: grey;
}

.timer-green {
  color: green;
}

.timer-orange {
  color: orange;
}

.timer-red {
  color: red;
}


.prev-scramble-label {
  color: black;
}

.prev-2-scramble-label {
  color: grey;
}

.prev-3-scramble-label {
  color: lightgrey;
}
Then we need to register this CSS file to the resource file in src/cubetimer.gresource.xml
<?xml version="1.0" encoding="UTF-8"?>
<gresources>
  <gresource prefix="/xyz/aguno/CubeTimer">
    <file>style.css</file>
    <file>window.ui</file>
    <file>gtk/help-overlay.ui</file>
  </gresource>
</gresources
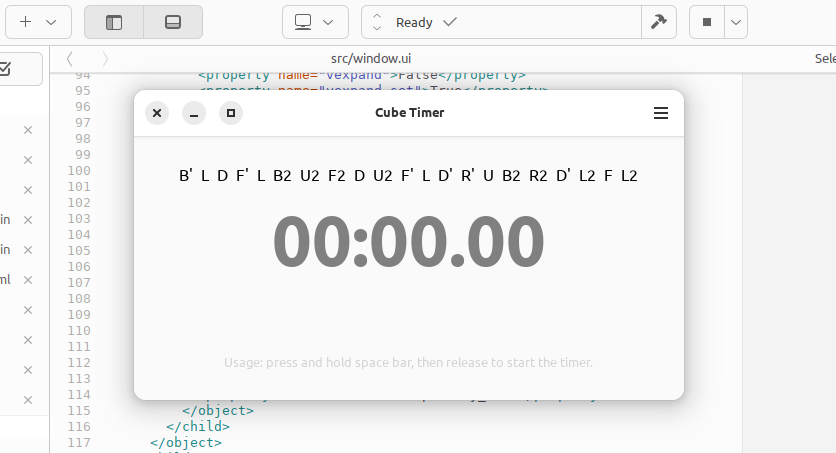
If you run the app again, you will get a better look of the UI, styled with CSS. :D
Enough about the UI and style, let’s manipulate a component!
Manipulating a component from Python code
We already have a timer-grey CSS class in style.css and we want to set this class programmatically at the start time of the app. In src/window.py, you have this Python class.
class Cubetimer2Window(Gtk.ApplicationWindow):
    __gtype_name__ = 'Cubetimer2Window'

    def __init__(self, **kwargs):
        super().__init__(**kwargs)
This is the class of your main window. To manipulate a GTK component, we need to call it by its identifier in the class, then manipulate it in the init function (if you want it to be triggered at start time). In this example, we will try to set two CSS classes to the component: timer and timer-red
class Cubetimer2Window(Gtk.ApplicationWindow):
    __gtype_name__ = 'Cubetimer2Window'

    Timer = Gtk.Template.Child("Timer") # Register the component by identifier

    def __init__(self, **kwargs):
        super().__init__(**kwargs)

        self.Timer.set_css_classes(['timer', 'timer-grey']) # Manipulate it
Then you will get the timer label colored in grey.
To connect with other components, you need to add them as well.
    ...
    Timer = Gtk.Template.Child("Timer")
    ScrambleNotation = Gtk.Template.Child("ScrambleNotation")
    PrevScrambleNotation = Gtk.Template.Child("PrevScrambleNotation")
    Prev2ScrambleNotation = Gtk.Template.Child("Prev2ScrambleNotation")
    Prev3ScrambleNotation = Gtk.Template.Child("Prev3ScrambleNotation")
    Menu = Gtk.Template.Child("Menu")
    ...
Connecting the component to an event handler
Because we want to build a timer/stopwatch, we need to listen to keyboard keypress. We did few things here:
- To manipulate the focus of the window. The Timer label will get the focus anytime.
- We create a function (on_key_pressed) to manipulate the Timer label by changing it to red color
- We add event listener (key press) then connect it to the function (on_key_pressed)
class Cubetimer2Window(Gtk.ApplicationWindow):
    __gtype_name__ = 'Cubetimer2Window'

    Timer = Gtk.Template.Child("Timer")
    ScrambleNotation = Gtk.Template.Child("ScrambleNotation")
    PrevScrambleNotation = Gtk.Template.Child("PrevScrambleNotation")
    Prev2ScrambleNotation = Gtk.Template.Child("Prev2ScrambleNotation")
    Prev3ScrambleNotation = Gtk.Template.Child("Prev3ScrambleNotation")
    Menu = Gtk.Template.Child("Menu")

    def __init__(self, **kwargs):
        super().__init__(**kwargs)

        # Manipulate focus
        self.Menu.set_can_focus(False)
        self.Timer.set_can_focus(True)
        self.Timer.grab_focus()

        # Listen to the events
        event_controller = Gtk.EventControllerKey()
        event_controller.connect("key-pressed", self.on_key_pressed)
        self.add_controller(event_controller)

        self.Timer.set_css_classes(['timer', 'timer-grey'])

    def on_key_pressed(self, controller, keyval, keycode, state):
        if keyval == Gdk.KEY_space:
            self.Timer.set_css_classes(['timer', 'timer-red'])
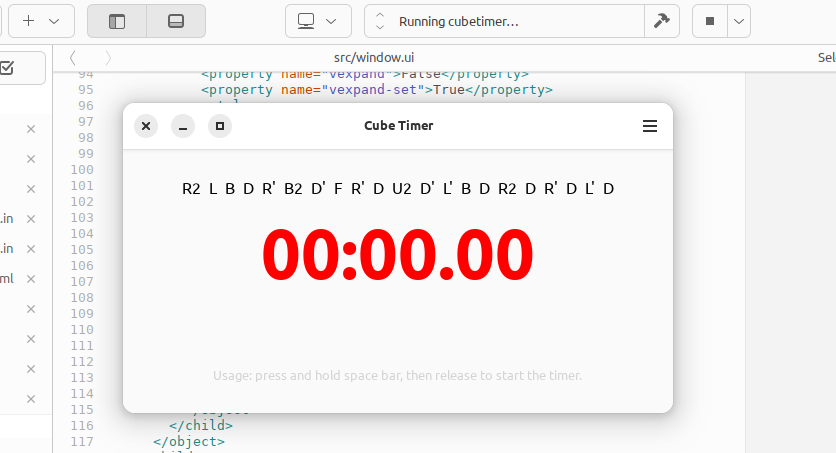
Let’s run it and then press space bar, you will see the Timer label color get changed to red.
I think that is enough. If you know how to write the Python code, then you know how to expand this to something that is more sophiscated. If you are looking for how I wrote the CubeTimer code, please take a look at my spaghetti code here.
https://github.com/herpiko/cubetimer/blob/master/src/window.py
See ya in the next part!
>> Home